> For the complete documentation index, see [llms.txt](https://cranford-tech.gitbook.io/stripe-connect-marketplace/llms.txt). Markdown versions of documentation pages are available by appending `.md` to page URLs; this page is available as [Markdown](https://cranford-tech.gitbook.io/stripe-connect-marketplace/implementing-key-features/give-merchants-access-to-stripe-express-dashboard/set-custom-descriptions-for-charges.md).
# Set custom descriptions for charges
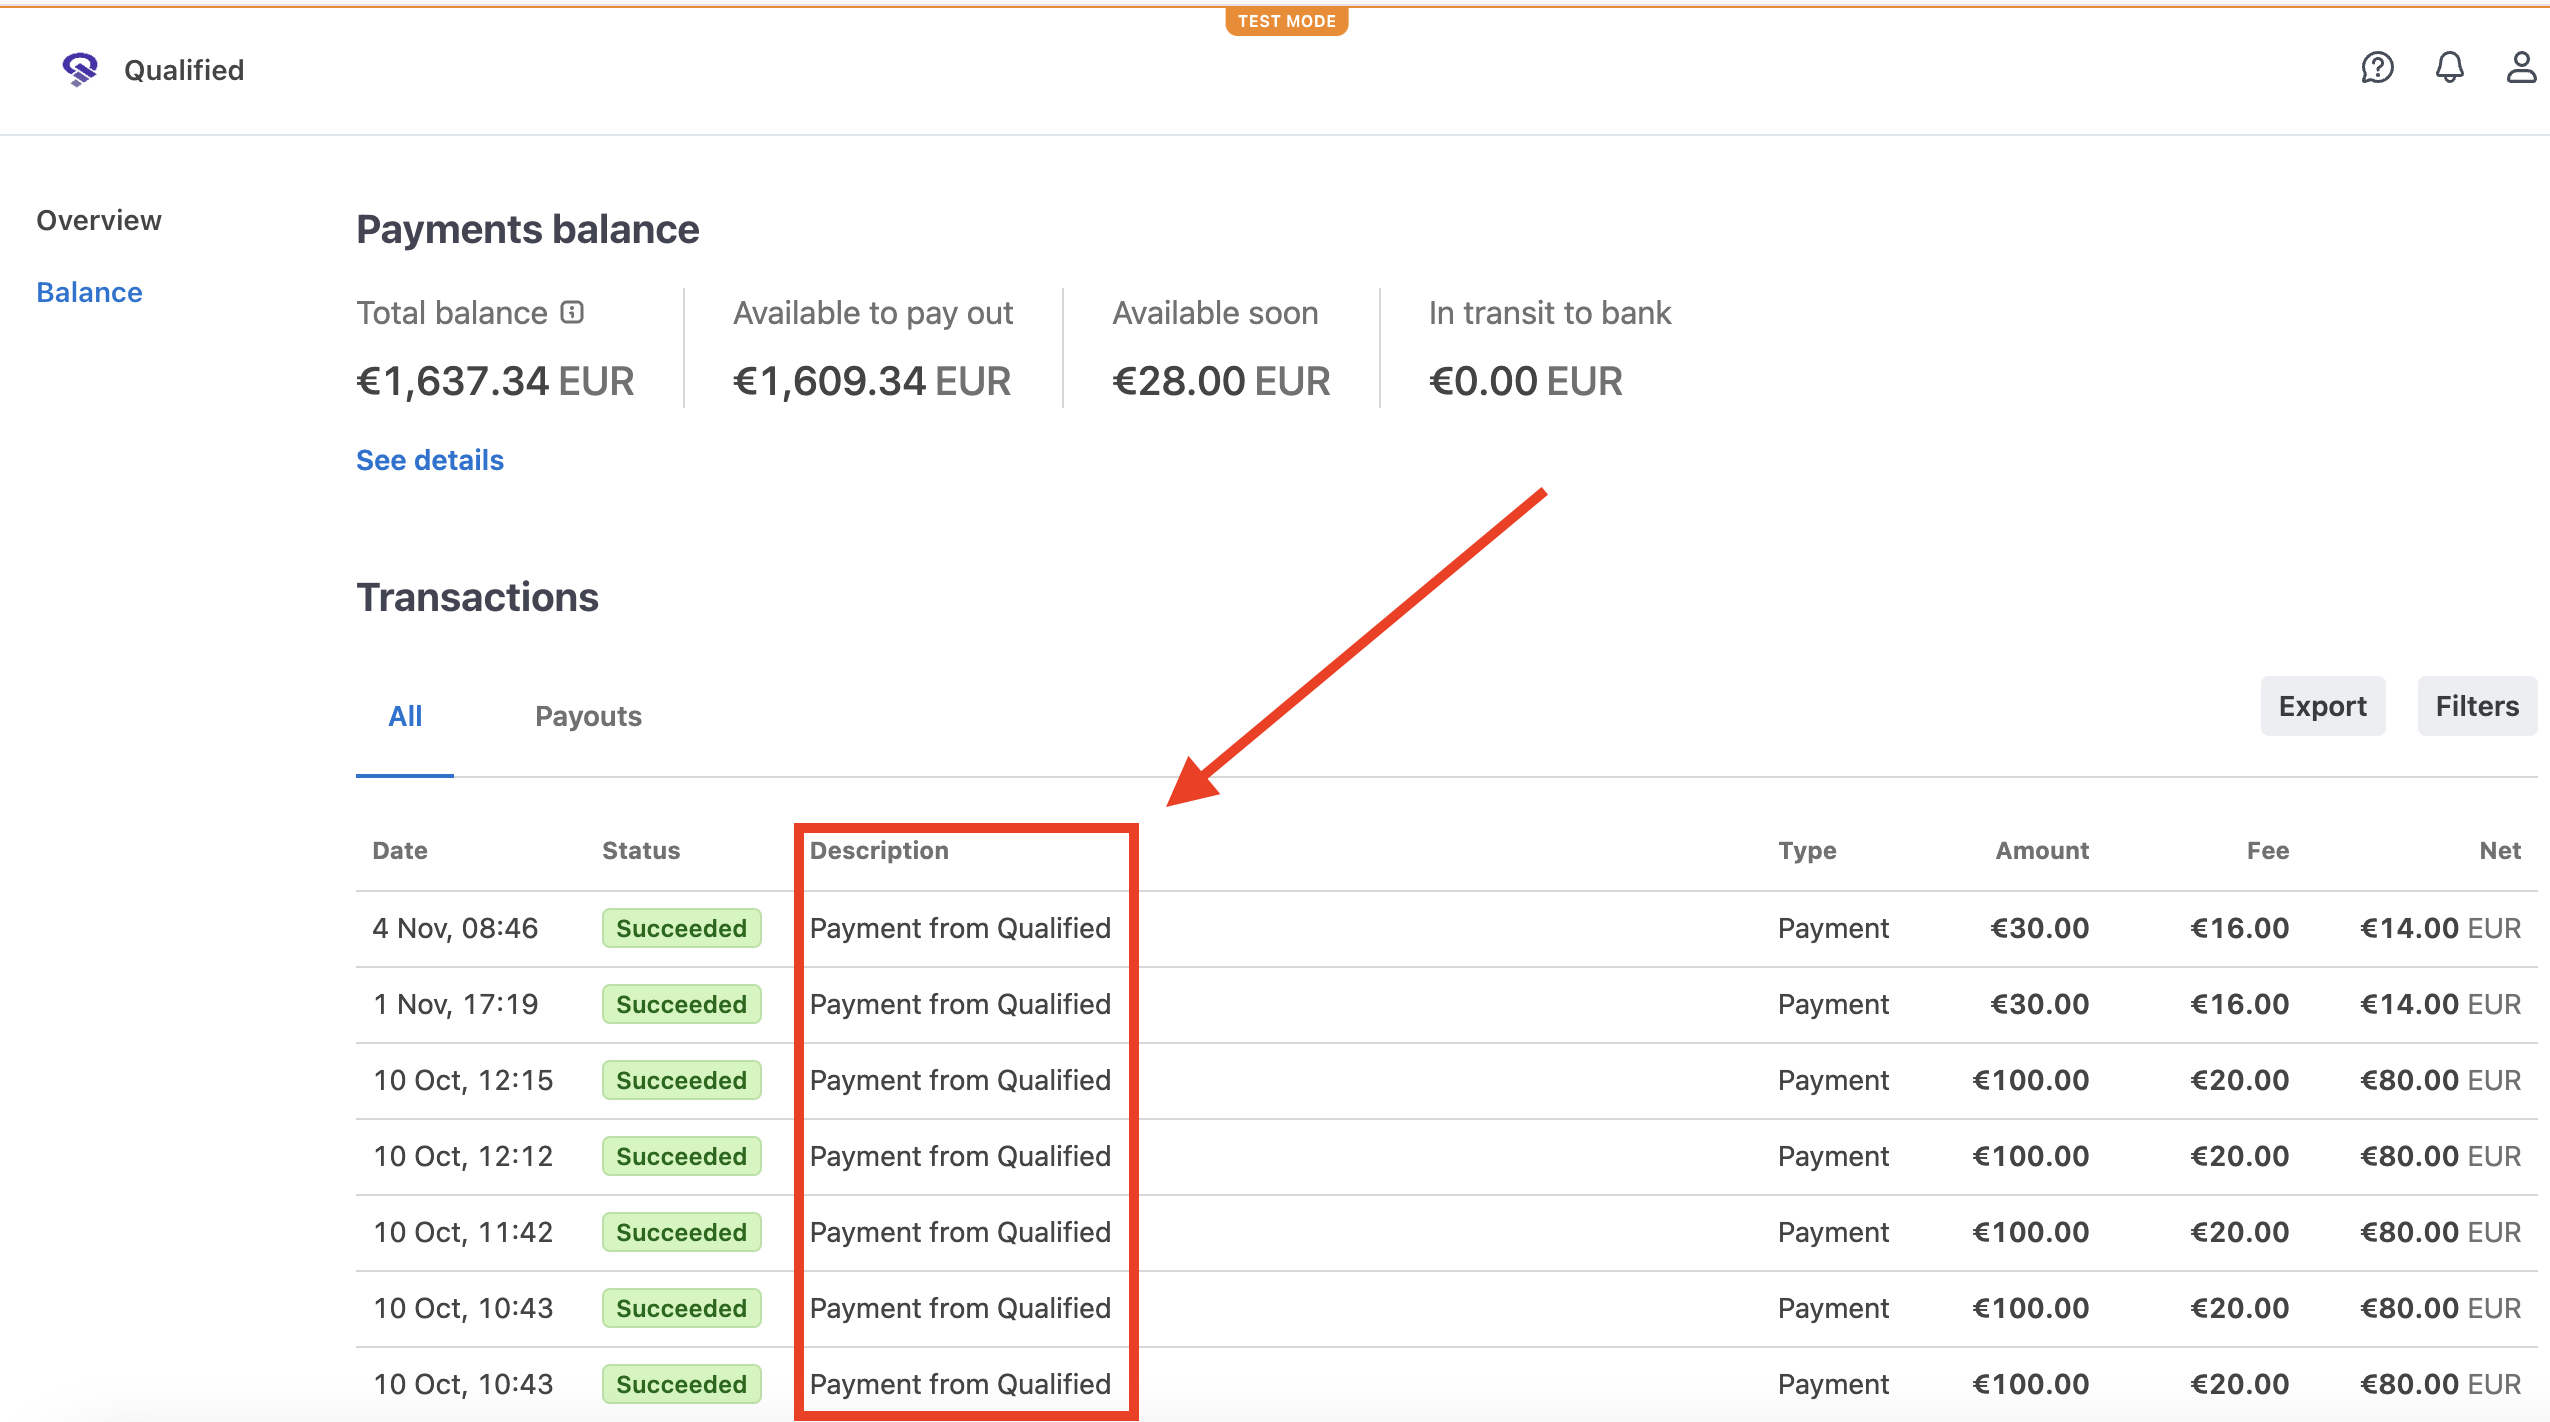
By default, all payments that merchants see in their Stripe Express dashboard will have the description:
'Payment from {PLATFORM NAME}'
EG see below:
### **Instructions**
You can edit this description by following these steps:
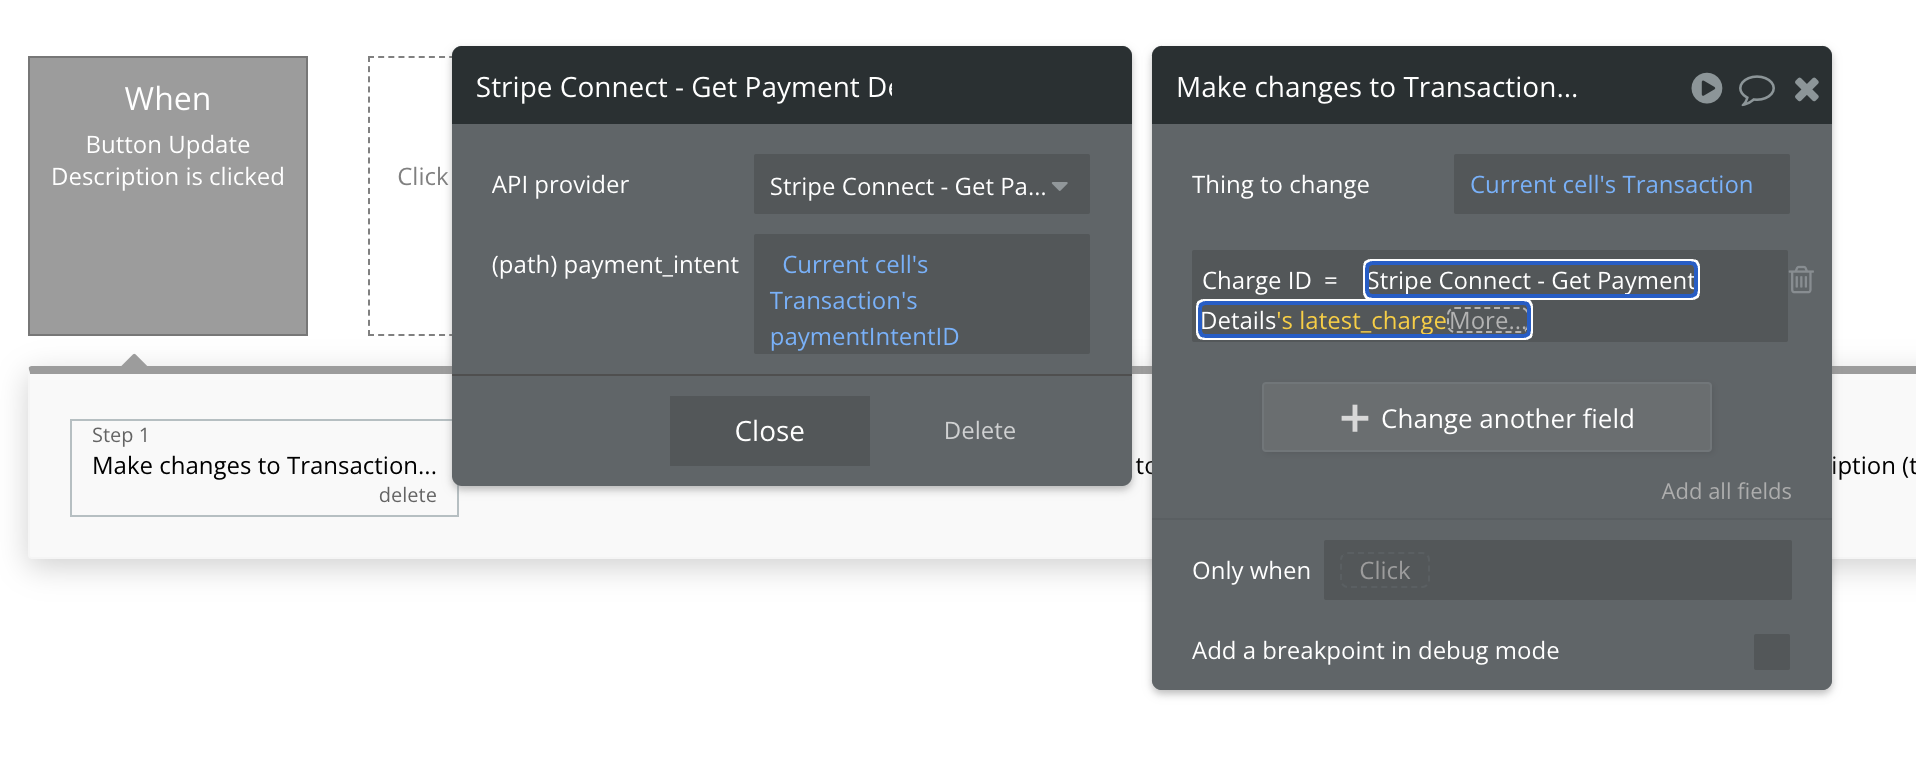
1. **Save down the Charge ID associated with a payment**
You can use the 'Stripe Connect - Get Payment Details' call that comes with the plugin to get this (you will need to have saved down the Payment Intent ID' to use it).
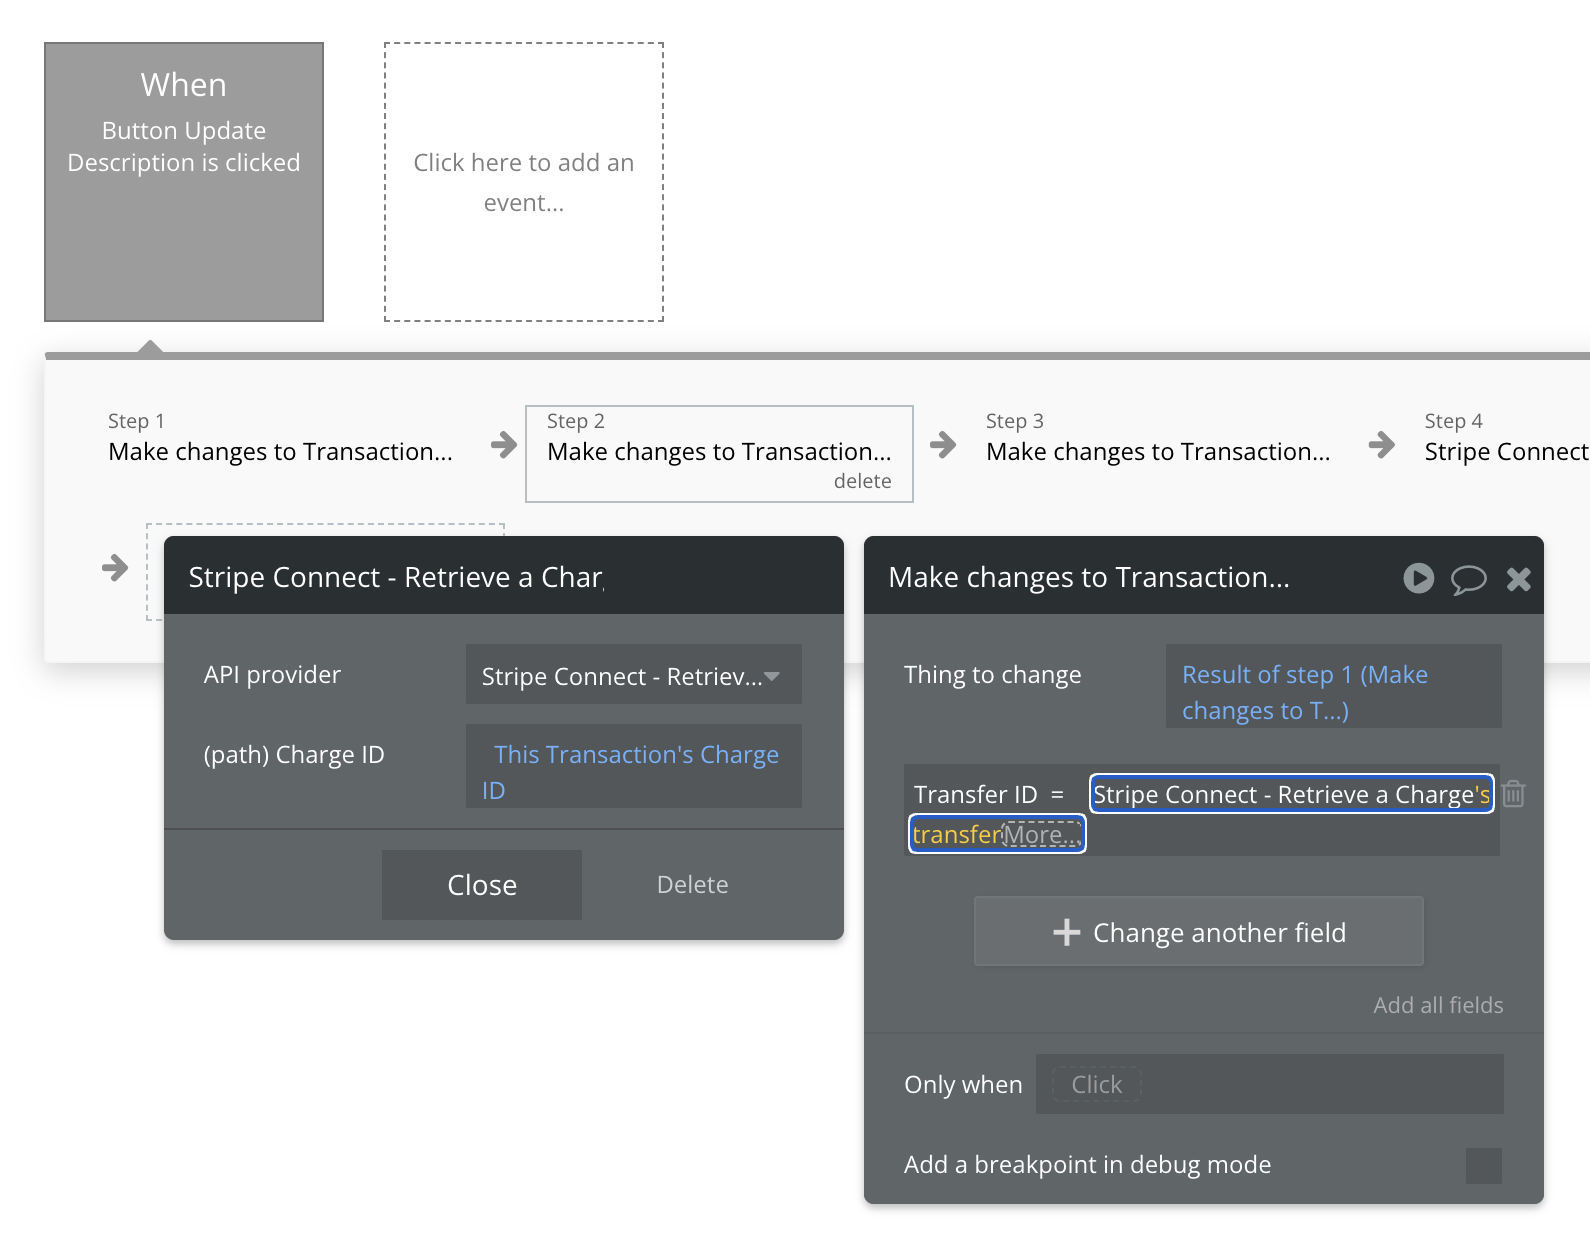
2. **Save down the Transfer ID associated with a payment**
You can use the 'Stripe Connect - Retrieve a Charge' call that comes with the plugin to get the Transfer ID (you will need to have saved down the Charge ID' to use it).
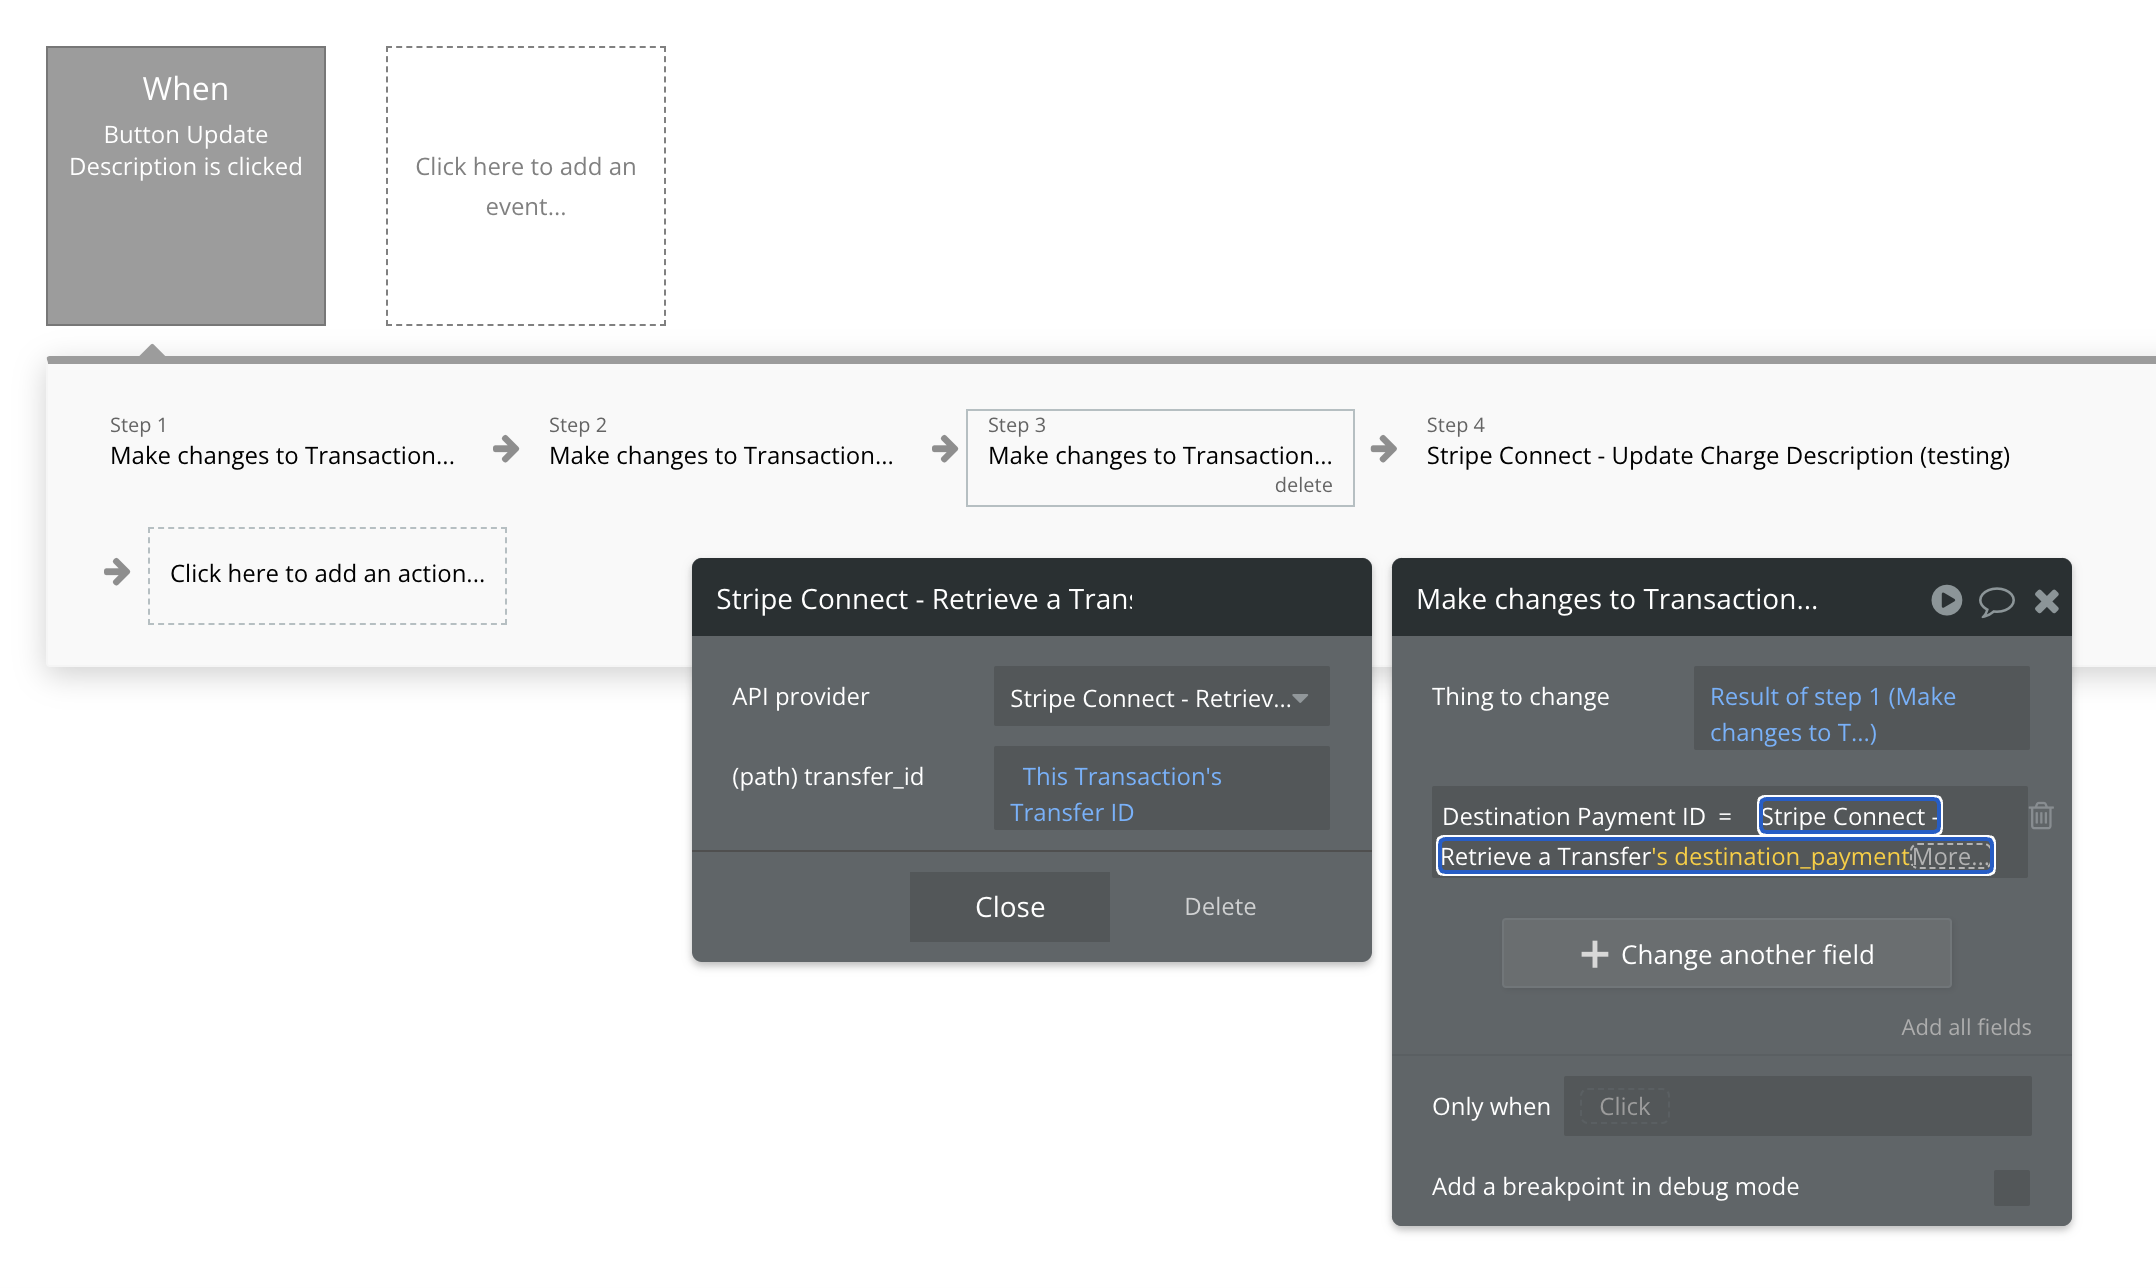
3. **Save down the Destination Payment ID associated with a payment**
You can use the 'Stripe Connect - Retrieve a Transfer' call that comes with the plugin to get the Destination Payment ID (you will need to have saved down the Transfer ID' to use it).
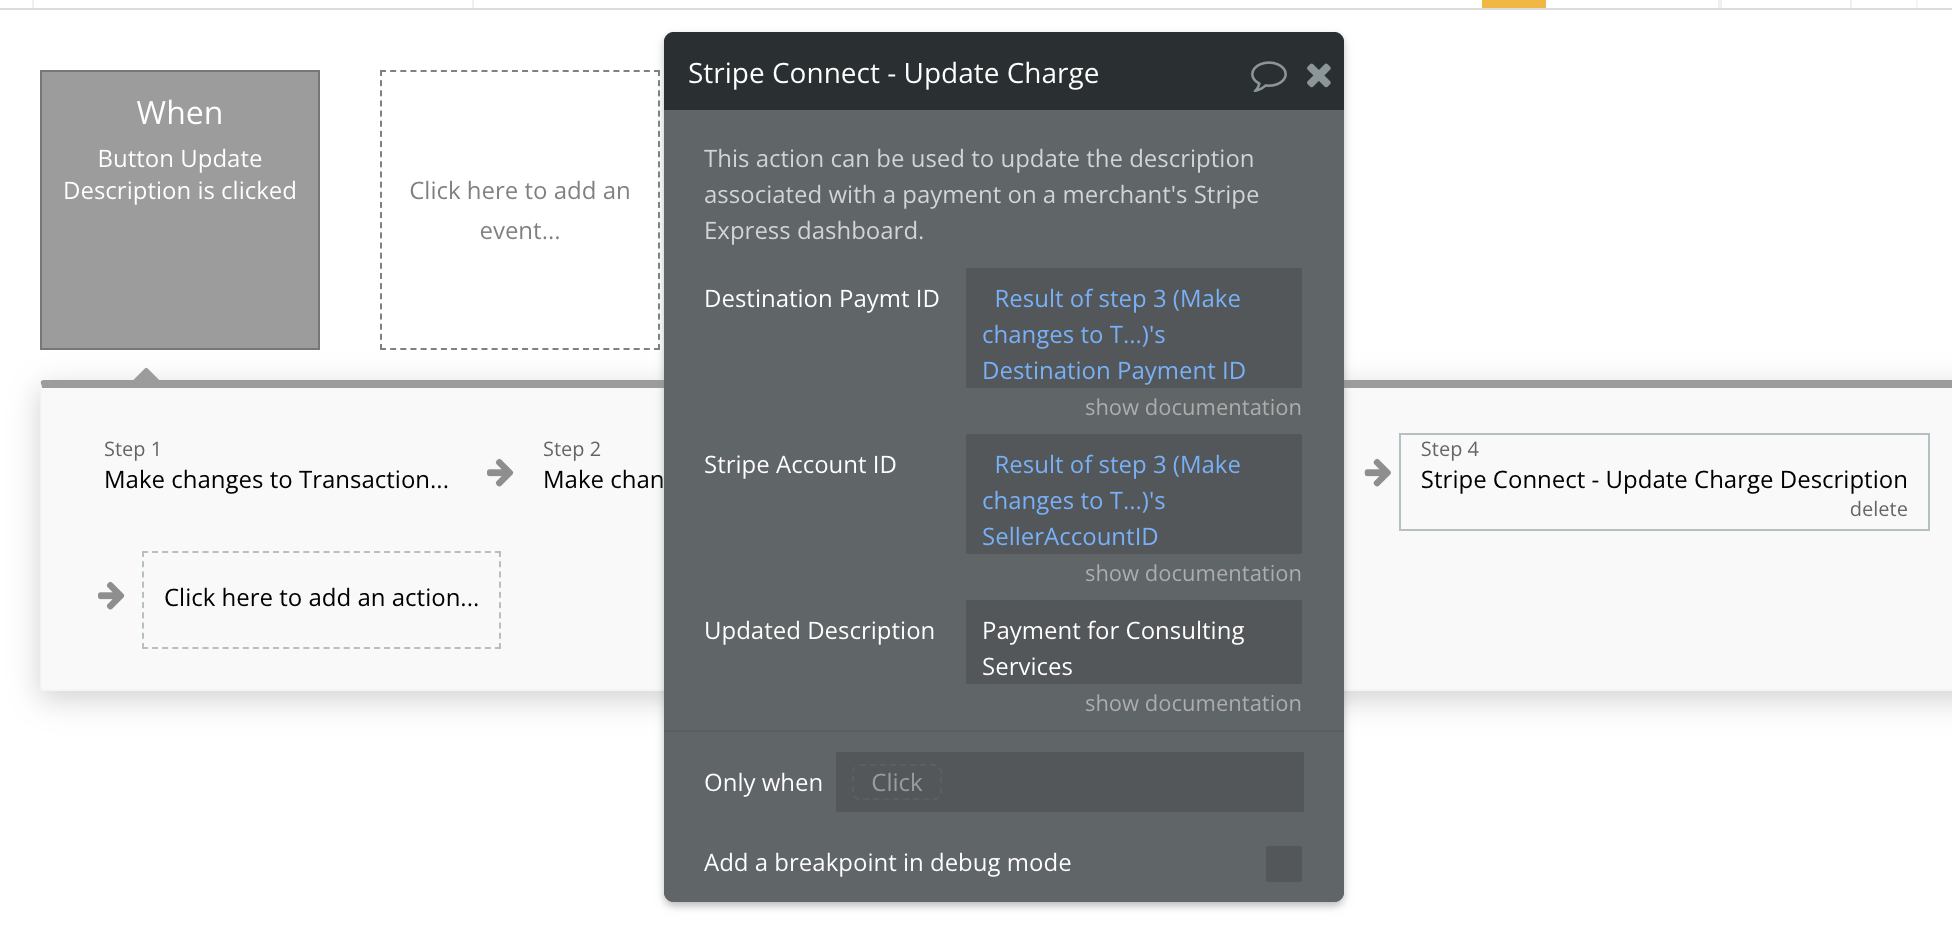
4. **Update the description**
Use the 'Stripe Connect - Update Charge' action to add a custom description to charge. You'll need to add the 'Destination Payment ID' (from step 3) and the Stripe Account ID of the seller to the relevant fields.
Add your custom description to the' Updated Description' field (you can also use dynamic data if you want to reference specific products or customers).
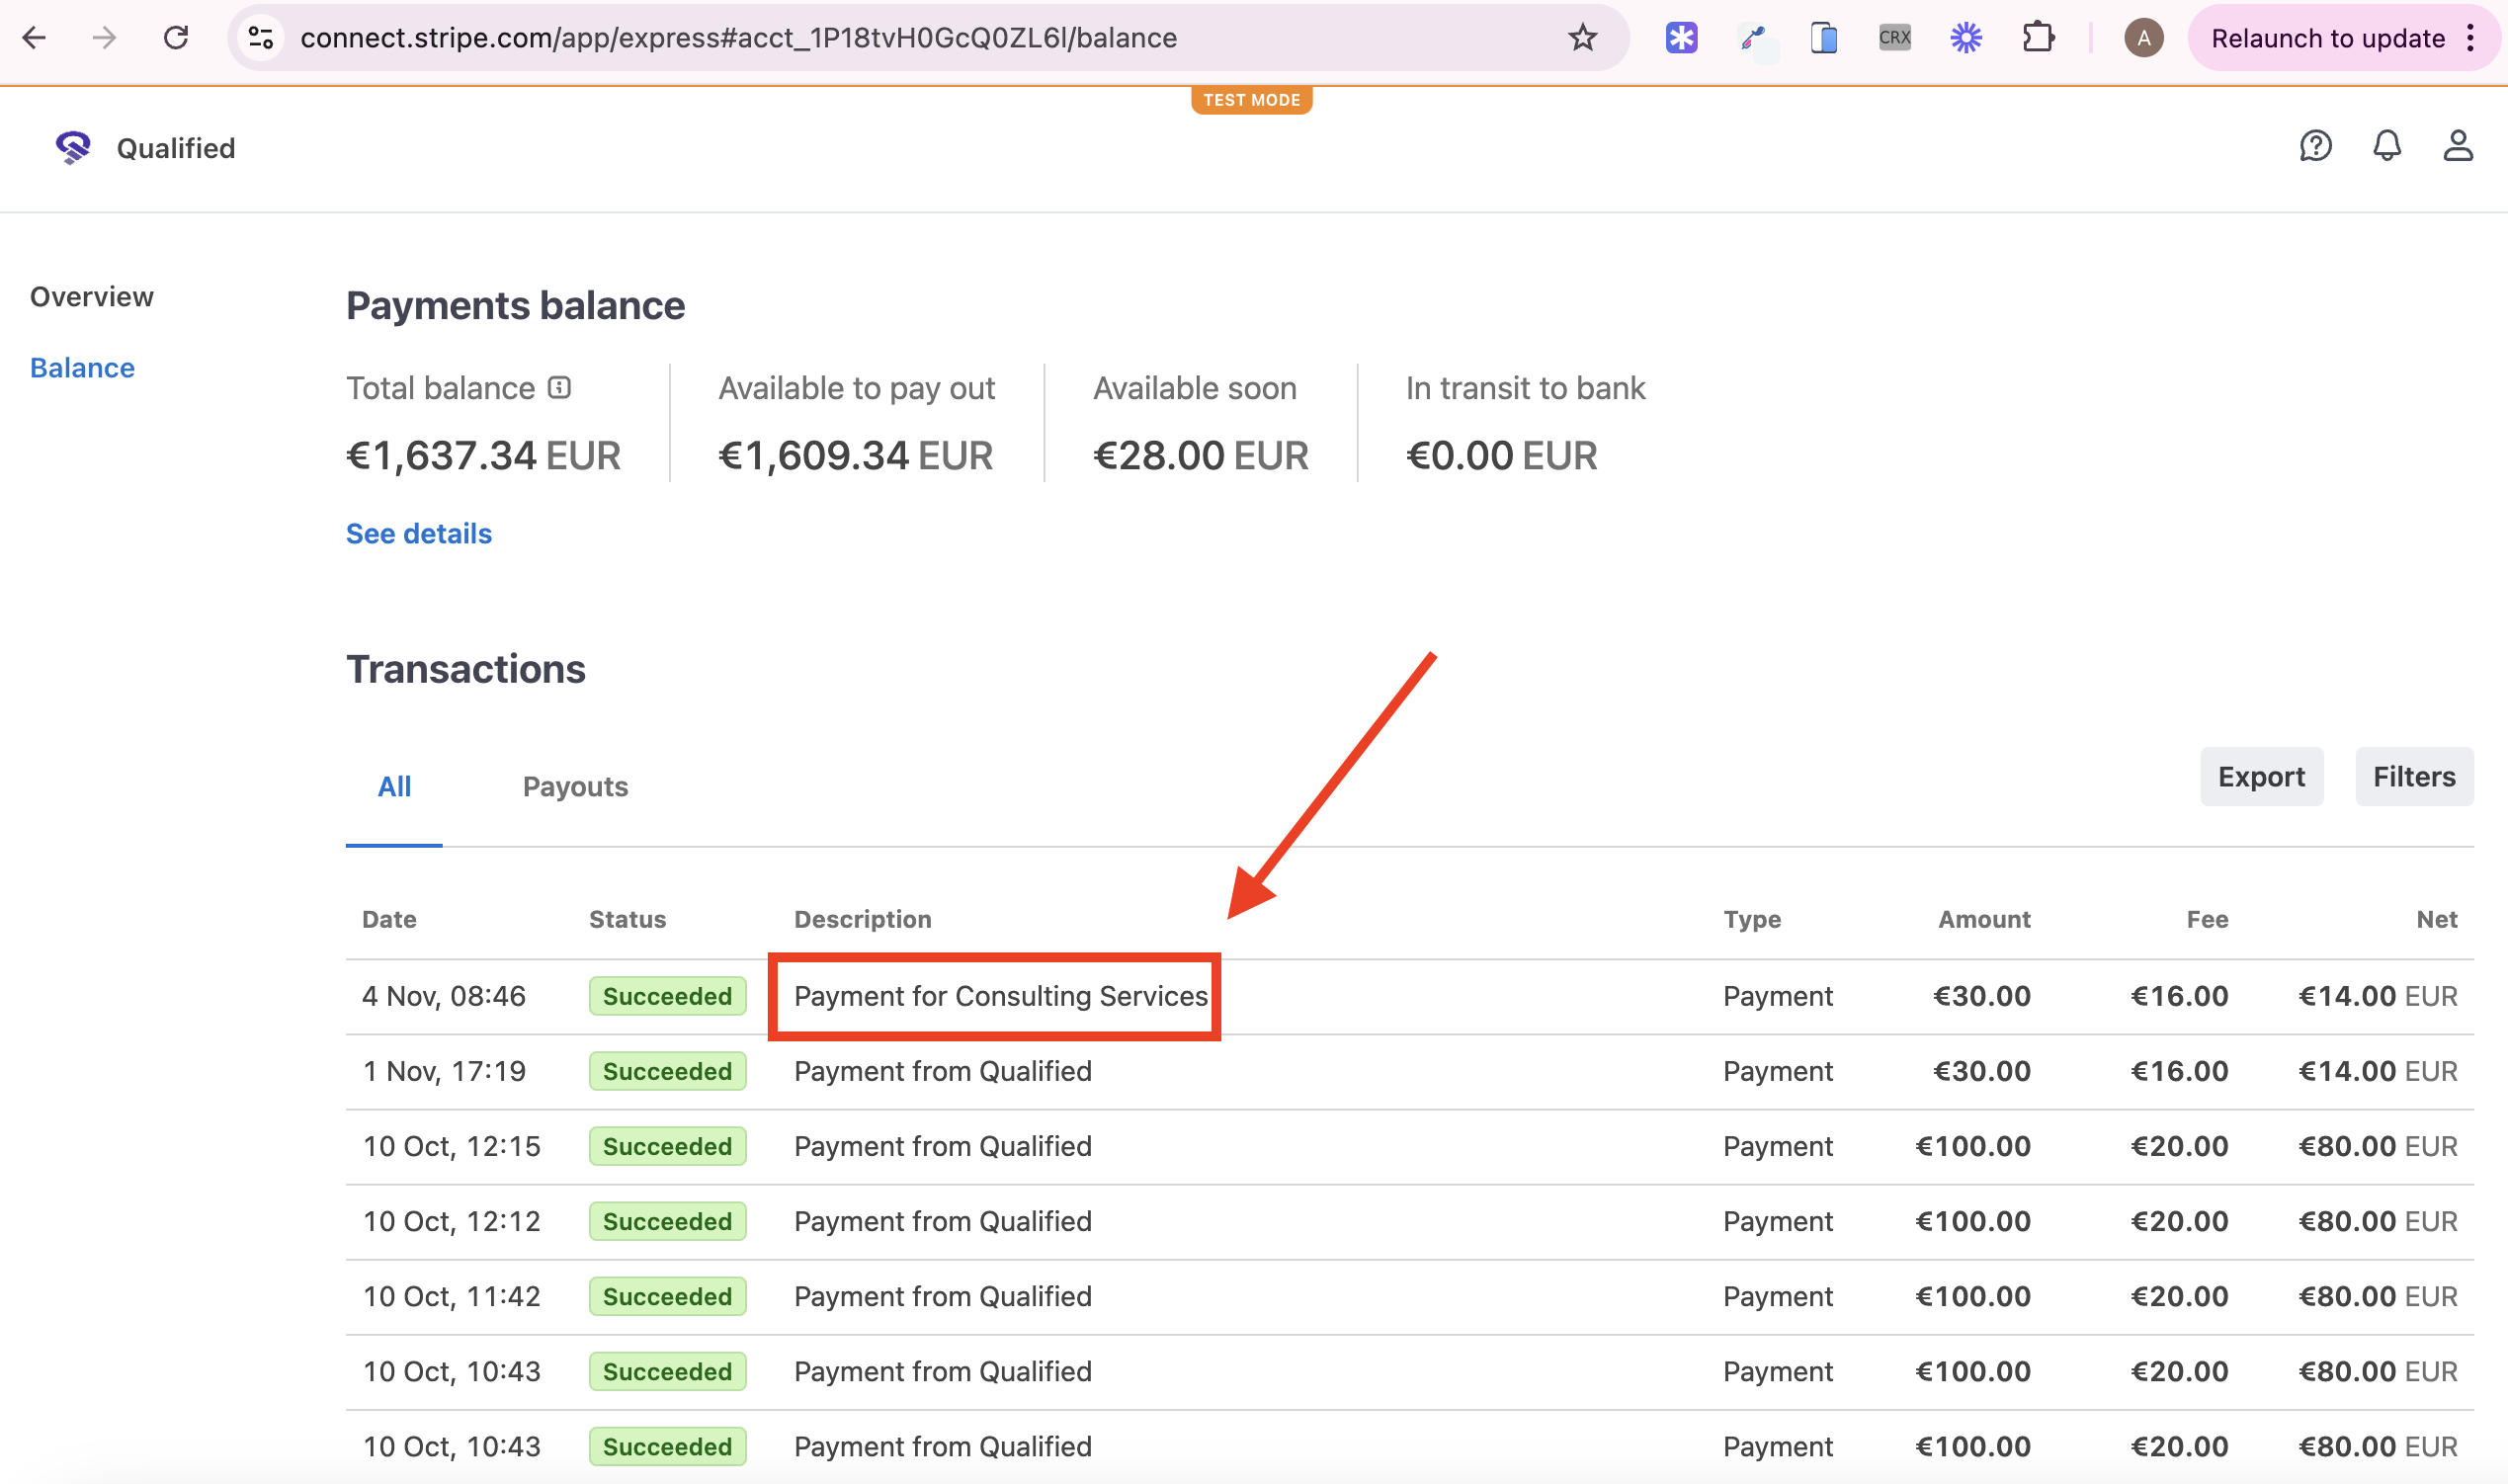
If you've done everything correctly, your merchant should now see a custom description for the relevant product in their Stripe Express Dashboard:
### Demo app
You can view an example of the database setup and workflow actions in the demo app at the below link. You will **need to run as the user **.
{% embed url="" %}
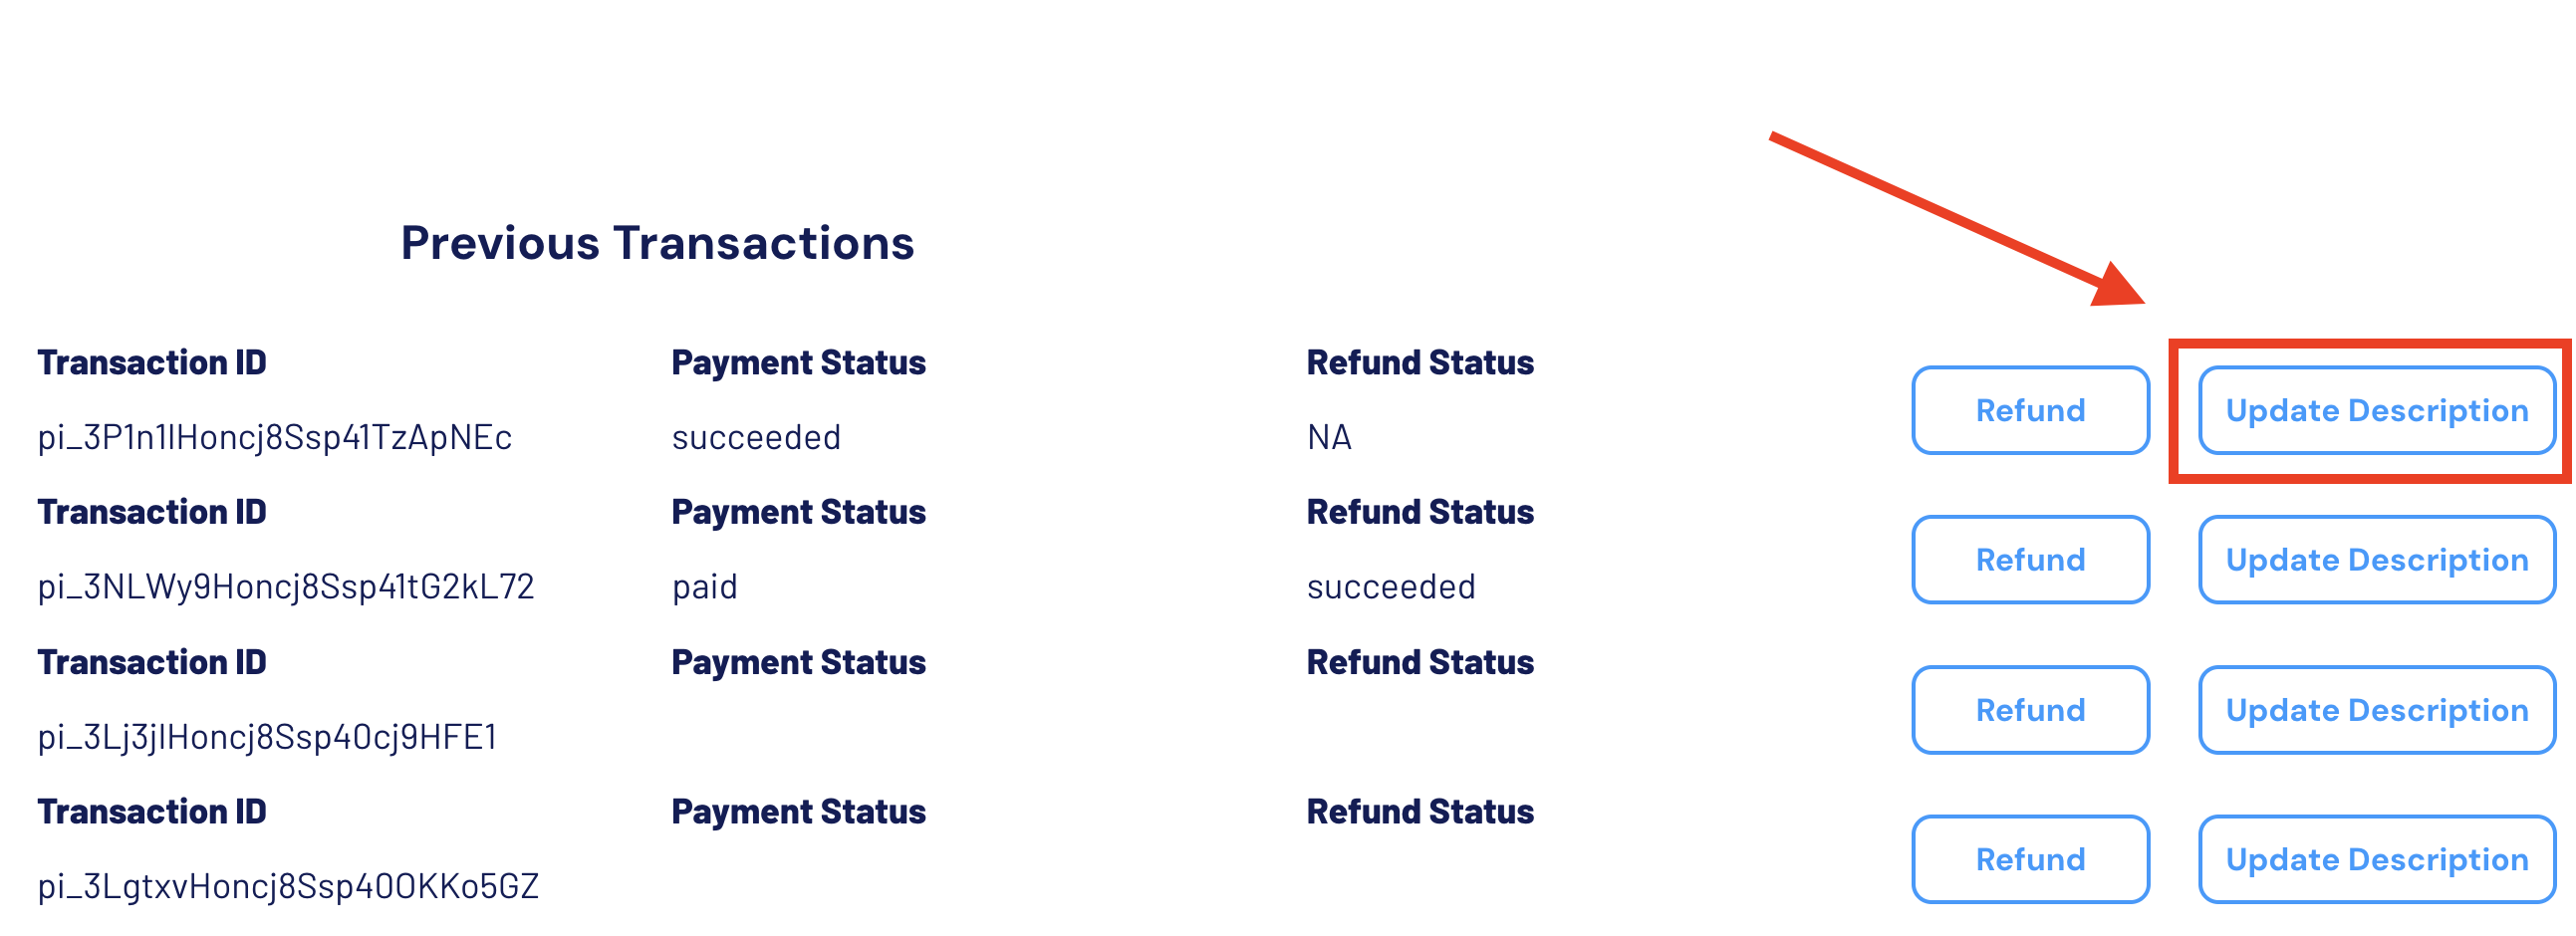
The workflow that updates the description associated with the payment is the one triggered by the 'Update Description' button:
The editor is public and can be accessed by clicking the 'View Editor' button at the top of the page.
### **Useful links:**
[Stripe documentation on customising the Express Dashboard](https://docs.stripe.com/connect/customize-express-dashboard)